Written by

Code Generation using Annotation Processor in Java
Generating REST Client from Swagger Documentation
Generating REST Client from Swagger Documentation

Java annotation processing JSR 269 is a standardized API to provide allow Java Compiler to runtime validate the code and generate source or byte code.
This provides a way to generate compile time code generation for java projects. Dynamically annotating a class and enhancing or introducing new behavior is a key feature we have seen in frameworks like Spring. While the behavior modification was creation of Proxy around certain Class and provide additional features underneath through Reflection. This feature was created at runtime in Java.
This feature is used by lot of existing java libraries already like Lombok, Mapstruct, Immutables. The JVM based Micronaut Framework is also been written from scratch to improve performance to not just use reflection and rather use compile time code generated, which would improve performance in runtime.
Micronaut introduced reflection-free approach to Dependency Injection and AOP. Framework's key feature is the usage of Annotation Processing which could generate all new functionality at compile-time instead of runtime as in the case of Spring which result in faster startup times.
Lombok goes beyond JSR 269 and adds additional code to modify the internal compiler's AST while JSR 269 was only meant to rather generate a new source code; which in alleged to break without warning when updating to a new compiler version.
While using with microservices, there are times to quickly integrate REST Service into your code. While Java Ecosystem is quite rich with http libraries like Apache HttpClient, OkHttp etc and one of my favourites, the declarative client OpenFeign; we explore the possibility to auto generate a client.
Let's use the code generation feature and auto generate a REST Client Adaptor directly from a public hosted Swagger Documentation - The PetStore 🐕.
To enable Compile time Annotation Processing we first need need to enable Annotation Processing configuration is your IDE; which would tell your compiler to enable Annotation Processor. If you are using IntelliJ IDEA you can follow link.
We setup a basic gradle project into 2 separate modules:
In this Module we create a build.gradle with following dependencies
dependencies {
    compile 'io.swagger.parser.v3:swagger-parser:2.0.27'
    compile 'com.squareup:javapoet:1.13.0'
    compile 'com.fasterxml.jackson.core:jackson-core:2.12.5'
    compile 'org.apache.commons:commons-collections4:4.4'
    compile 'org.apache.commons:commons-text:1.9'
    testCompile group: 'junit', name: 'junit', version: '4.12'
}
Create a Custom Annotation SwaggerClient which when annotated to a class, would trigger the compilation and in turn leads to generation of any new code.
@Retention(RetentionPolicy.SOURCE)
@Target(ElementType.TYPE)
public @interface SwaggerClient {
    String location();
}
Enable Annotation Processor via META-INF configuration in this submodule.
To do this, create a file in directory resources/META-INF/services/ named javax.annotation.processing.Processor and add entry for your Annotation Processor classes as FQCN. We would name our annotation processor class as SwaggerClientProcessor . It can have list of Annotation Processors per line.
For us, file's content would be
com.whackd.library.SwaggerClientProcessor
Now, Create the SwaggerClientProcessor Class. This processor class has to be extended from javax.annotation.processing.AbstractProcessor
@SupportedAnnotationTypes("com.whackd.library.SwaggerClient")
@SupportedSourceVersion(SourceVersion.RELEASE_11)
public class SwaggerClientProcessor extends AbstractProcessor {
    private Messager messager;
    private Filer filer;
    private Elements elements;
    private Map markedClasses;
    ...
}
We would have to implement 2 methods: init and process
@Override
public synchronized void init(ProcessingEnvironment pEnv) {
    super.init(pEnv);
    filer = pEnv.getFiler();
    messager = pEnv.getMessager();
    elements = pEnv.getElementUtils();
    markedClasses = new HashMap<>();
}
In the process method, we start processing all classes which are marked with @SwaggerClient annotation.
@Override
public boolean process(Set annotations, RoundEnvironment roundEnv) {
    for (Element element : roundEnv.getElementsAnnotatedWith(SwaggerClient.class)) {
        if (element.getKind() != ElementKind.CLASS) {
            messager.printMessage(Diagnostic.Kind.ERROR, "Can be applied to class.");
            return true;
        }

        TypeElement typeElement = (TypeElement) element;
        markedClasses.put(typeElement.getSimpleName().toString(), element);
    }
    ...
}
Get the json target url location from Custom Annotation's location property, and start parsing the Swagger Json
Swagger swagger;
try {
    final String location = element.getAnnotation(SwaggerClient.class).location();
    swagger = new Swagger20Parser().read(location, null);
} catch (IOException e) {
    messager.printMessage(Diagnostic.Kind.ERROR, "Error fetching Swagger API Metadata.");
    return true;
}
Now, using JavaPoet library we add code to generate source Java Class by iterating the values from Swagger Parser. Here's small snippet of the code.
final Map definitions = swagger.getDefinitions();
for (Map.Entry pathEntry : swagger.getPaths().entrySet()) {
    String path = pathEntry.getKey();
    Path pathInfo = pathEntry.getValue();
    final List paramKeys = parsePathParams(path);

    for (Map.Entry opsEntry : pathInfo.getOperationMap().entrySet()) {
        HttpMethod httpMethod = opsEntry.getKey();
        Operation operation = opsEntry.getValue();
        List headerParameters = new ArrayList<>();
        List queryParameters = new ArrayList<>();

        MethodSpec.Builder methodBuilder = MethodSpec
                .methodBuilder(operation.getOperationId())
                .addException(Exception.class)
                .addModifiers(Modifier.PUBLIC, Modifier.STATIC);
... In this module, we simple use the Main class and import our library.gradle submodule.
dependencies {
    implementation project(':library')
    annotationProcessor project(':library')
    testCompile group: 'junit', name: 'junit', version: '4.12'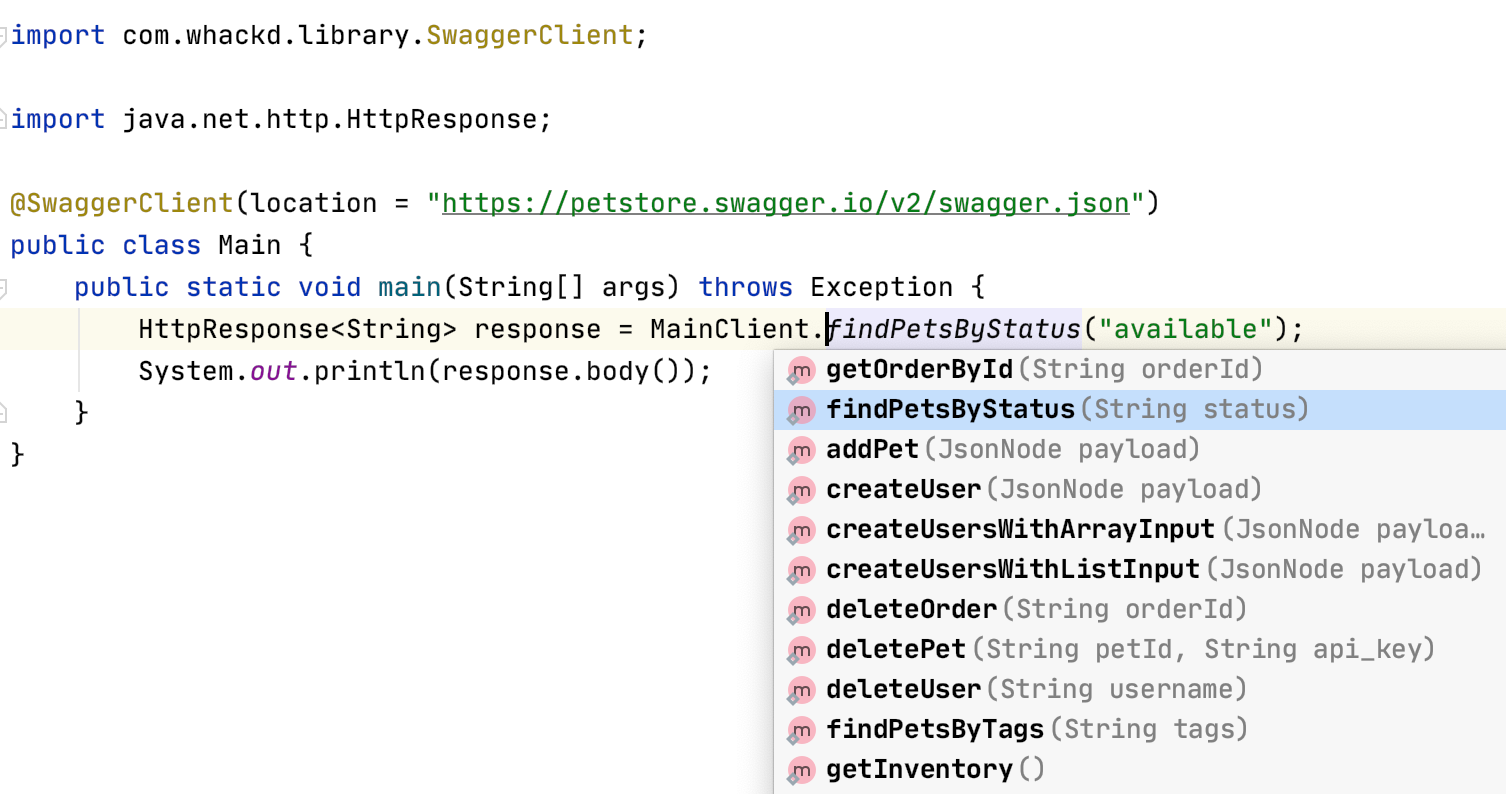
}Let's start testing the integration for our Custom Annotation @SwaggerClient. We simple mark our project's Main class with required annotation giving Swagger Documentation HTTP url. After adding annotation remember to recompile Main class if auto-generation does not happen. If your compile target has been set to gradle, then recompile the Main class file manually. Our implementation would generate a new class MainClient which would have all methods corresponding to the endpoints of Swagger Documentation.
The compilation of Annotation Processor does not happen on the same JVM as source on which annotation was integration on. Instead it happens separately in a different JVM. Which in turn uses javac to compile all the classes with-processoras a flag. Gradle helps with this compilation using theannotationProcessorDependencyHandler.
annotationProcessor project(':library')After recompilation, we check the MainClient class generated in the generated sources build directory. It got compiled and added to our build generated sources annotation directory. Cool ! 👍
playground/build/generated/sources/annotationProcessor/java/main/com/whackd/playground/MainClient.javaNow the Magic. We have autocomplete available while coding! This is the exact feature we want to achieve. 👏🏽
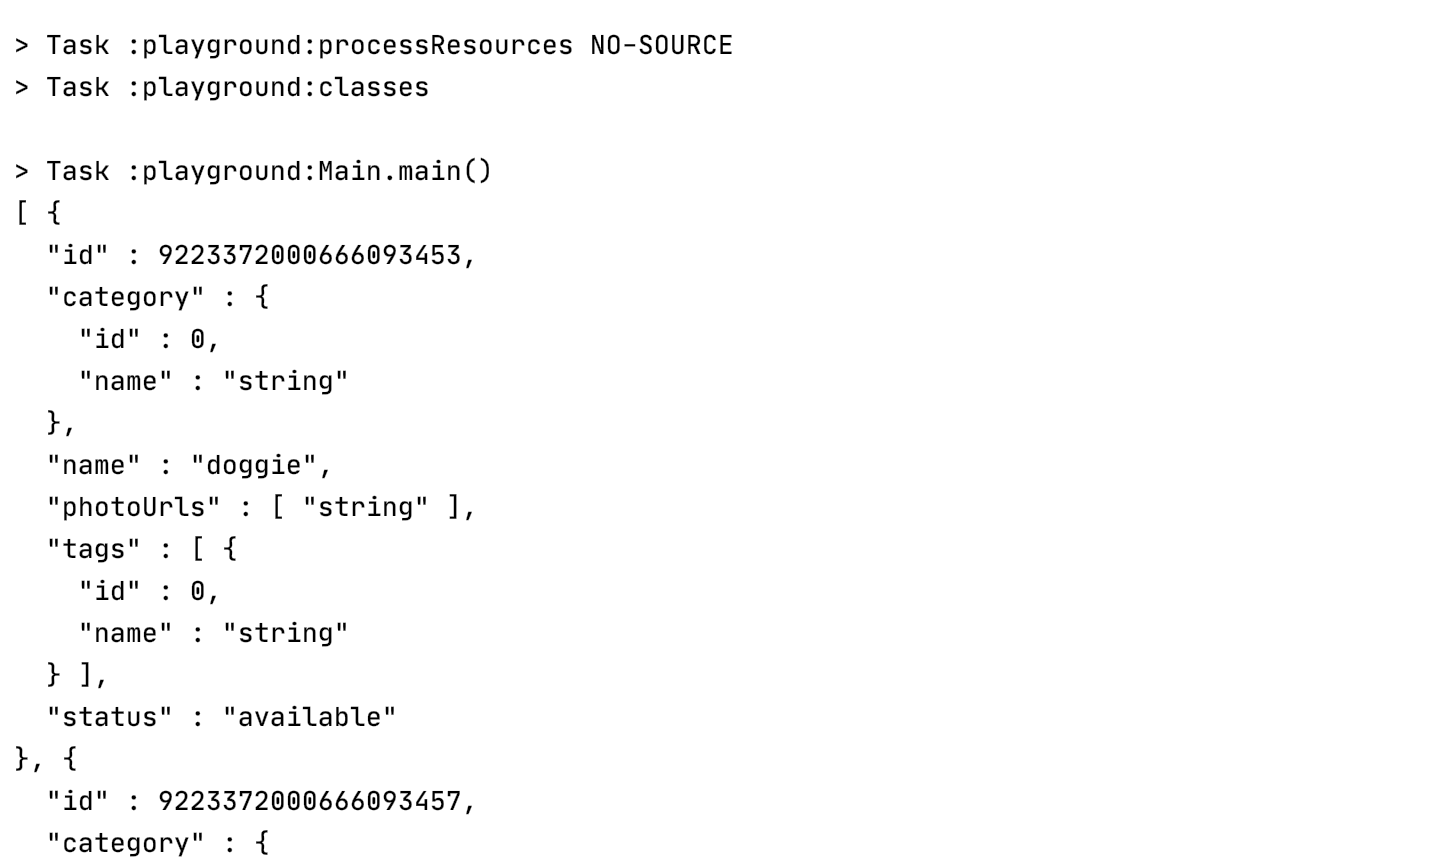
Execute it now already 🚀
Concluding this post, code generation is a beautiful idea to automate and speed up your development process. Easier to integrate, makes your teams adhere to single coding style strategy since it is compiled time validated.
No need to spend time on Code reviews, Code creation for new services and Code style changes every time a new integration is required.
 Automate Kubernetes deployment using Argo CD